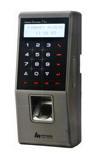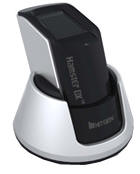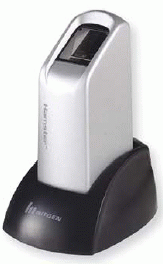

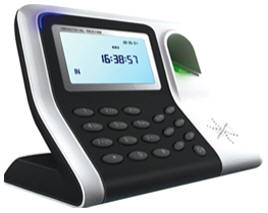
BioDesk v2 is our new digital fingerprint time attendance device
with a desktop design and enhanced features.
- Standard USB communication: plug and play
- Identification modes: fingerprint, card+password, fingerprint+password, fingerprint+card
- Built in 1300mAh lithium ion battery that supports 4 hours continuous operation if external power is not available
- Multiple language options and easy operation method
Package Contents
- Time attendance device
- USB cable
- Attendance management software installation CD
- Manuals
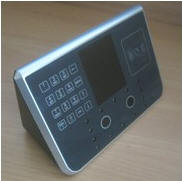
Device Familiarization


Back View

Side View

Bottom View

Bottom View With Battery Cover Open

USB Cable

USB Cable Connected to Back of Device

Operation
Turning on
- Press power on button to turn the device on. Display in the following format will be shown on the LCD.

Enrolling Admin [fingerprint]
- For security reasons, it is recommended to enroll admin first. Click on Enroll FP, give the user ID as 8888 which Is the default admin ID. Follow instructions on LCD and enroll fingerprint.
- After the admin is enrolled, all menu operations must be confirmed by the admin.
Enrolling user [fingerprint]
- Press on Enroll FP. Admin Affirm will be displayed on the LCD. Perform admin fingerprint verification at this point, only then the device can proceed with enrollment.
- Give the user ID to be enrolled. By default an ID will be displayed on the LCD which can be used. The ID is of 5 digits. Suppose ID number 100 is to be enrolled. Either 100 or 00100 can be entered; the device will treat both as same.

- Follow the instructions on the LCD and enroll the finger print.
- After successful enrollment, New Enroll Continue will be displayed on the LCD. If more users are to be enrolled, press OK, else press ESC.
- Now the LCD shows Backup Enroll. If a user wants to re enroll his fingerprint, press ok, enter corresponding user ID and enroll fingerprint.
Enrolling password/RFID card
- Press PW/Card and perform admin verification.
- If the device is not equipped with ID card/Mifare card module, it directly asks Enroll Pwd New Enroll.
- If the device has an ID card module, the LCD will display two options : Enroll Pwd and Reg RFID. If it has an Mifare card module, it shows Enroll Pwd and FPCard Mng. Use IN / OUT buttons to scroll and press OK to confirm.

- If Enroll Pwd is selected, New Enroll will be displayed on the LCD. Press OK to enroll a new user with password. Press ESC to enroll password for an existing user.
- For a new user, give user ID to be enrolled. Input password when asked. It is of 1-5 digits. Confirm password by re entering it. After successful enrollment, either another password can be enrolled for a different user by pressing OK or go back to enroll password/card menu by pressing ESC.
- For an existing user, enter the user ID for which password is to be enrolled. Follow instructions on LCD to complete enrollment.
- For enrolling an RFID card, follow the same procedure.
- Enrolling an Mifare card is optional facility which is not available by default.
Fingerprint, password and card verification
- There are two types of fingerprint verifications, 1:N and 1:1.
- In 1:1 verification, the user enters his ID first, then enters the fingerprint and the device will match the fingerprint currently obtained with the fingerprint already stored against the entered user ID.
- In 1:N verification, user enters his fingerprint only and the device will match it with all the fingerprints stored.
- For password verification, enter the user ID first, then the password. The device gives a voice message ‘thank you’ on successful verification. On failure, it shows Error Pwd.
- For ID card verification, just show the card in the sensing area for verification.
Delete User
- Press DelUser to delete user(s). The device will ask for admin verification. After successful admin verification, enter the ID of user to be deleted. Remember that the device will not ask for a delete operation confirmation. As soon as the user ID is entered and OK is pressed, the corresponding user will be deleted.

Checking In/Out
- To check in, press the IN key. ‘check-In’ will be displayed on top left corner. Proceed with fingerprint/password verification.

- To check out, press the OUT key. ‘check-Out’ will be displayed on top left corner. Proceed with fingerprint/password verification.

Time Settings
- Press TimeSet to enter the time settings interface. Use IN/OUT keys to navigate and modify time. On the top, the scheduled time can be used to set the scheduled alarm. At any time, DelUser key can be pressed to disable the scheduled alarm.

Language Settings (optional)
- The language for information display and voice prompt can be changed. Press key ‘5’ four times to enter the language selection interface.
Power Management
- The device is equipped with USB interface power and backup batteries (1300mAh lithium ion battery). When the USB interface power adapter is supplying power to the device, the batteries are charged at the same time.
- When the USB interface power is unavailable the device automatically switches to backup batteries. They when fully charged can run the device for three hours.
- A battery icon can be seen at the upper right corner of the LCD screen.
- When the device is using only the backup batteries for power, the icon shows the remaining power of the batteries.
- When the device is using both the USB interface power and the backup batteries, battery icon shows the charging status.
- When the device is using only the USB interface power, the battery icon is hidden.
- When the battery charge is about to be finished, the buzzer sounds every second for five minutes.
Automatic Test
- In stand by mode, press ‘6’ four times, then press TimeSet. The following prompt will be displayed. Press OK to start automatic checking of the device. Ensure uninterrupted availability of power during the test.

Specifications
- Fingerprint capacity: 500 templates
- Event capacaity: 30,000 events
- Fingerprint sensor: Optical fingerprint sensor
- Display: Black & white LCD
- Back up battery: 1300mAh lithium ion battery
- Communication: USB client
- Identification speed: less than or equal to 2 sec
- FAR: less than or equal to 0.0001%
- FRR: less than or equal to 1%
- Operation temperature: 0-45C
- Operation humidity: 20-80%
- Languages: English, Spanish, Portuguese, French
- Power supply: DC 5V 800mA
- Optional functions: ID/Mifare card
- Dimensions: 158 x 124 x 110 mm
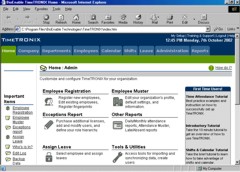
Attendance Management
- The check-in/check-out report statistics are processed by the attendance management software which can be installed on any PC. The device can be directly connected using a USB cable to PC. Remember that no operation is possible on the device while it is connected with the PC.
- The database used by the attendance management software is Microsoft Access database (.mdb). By default, it can be accessed from C:\Program Files\Att2008\att2000.mdb
- For more details regarding connection, refer the Quick Start Guide.
- For more details regarding attendance management software operations, refer Attendance Management Software User Manual.